Monday, November 23, 2015

Trifecta!

Today I am weaving on all three looms in the loom room for the first time

L-R: BigMac, Dot, and Bernie.
Yesterday I finished dressing BigMac with the second 2015 Christmas towel warp.  Much easier with the angel wings and support from Anne.  I've revised the tie-up considerably as the original worked fine but was not the most efficient.  I spent a couple of hours on the computer to reduce it to what it should have been in the first place - a five shaft huck lace design.  It has allowed a better treddle layout with the tabby treddles (most used) space to the left and then the three pattern treddles in sequence for the right foot.  It should cut my weaving time down a little bit.

The first pattern repeat (confirming the computer work).
Dot has been ready to weave for a little while, but I needed to add some floating selvedges and then weave enough to see if the syncopated threading: Rosepath design would work.  Even given that I am weaving at quite a wide set and will need to wet finish it to draw it in to the final dimensions, the diamond color patterns are starting to appear (if you squint!).  The coaster guild challenge is due in January so I should make that deadline.

Red and purple diamonds appearing with the green weft.
Bernie has been a little neglected after starting the first stripe design I put weaving there on hold to work on the other two projects. 

Progress so far (this is the 'back')


The real priority now is to finish the Christmas towels in time to wrap and send out the Christmas presents.  We are finishing the designs for our 2015 Christmas card to accompany the towels.  That should be completed tonight ready to start printing.

I still have loom #4, the original counter balance loom (unnamed as yet), and of course the loom I am restoring.  I'm still awaiting the final go-ahead to continue the restoration, but there was never a rush on that.  I will have to test weave something with it so will try for 4 looms in action when that occurs.  There's definitely no room for an attempt at '5' at this stage.

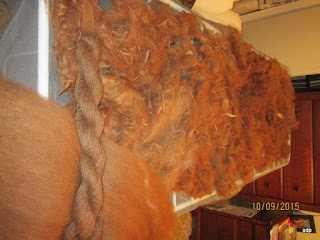
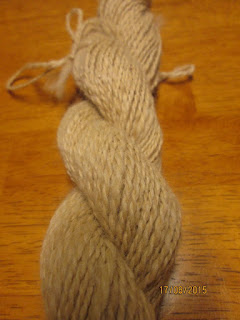
We are also still working on llama spinning - although mostly just removing guard hairs from the current pile of wool. 

Sunday, November 15, 2015

First batch of towels finished

Yesterday I finished the final 3 towels by hand stitching the hems.  They joined the rest in a nice satisfying 'pile' of towels.

Finished towels
Next step is to wrap up those towels that are Christmas presents for the NZ family, then get going on the second batch.

I've wound out the skeins for the red and green stripes and washed them.  Currently I am dyeing some smaller lots in red, green, and purple for a guild mug rug challenge.  As soon as they are done I'll do the larger amounts for this project. 

While winding skeins I did a third amount which will by dyed in the indigo pot so that after Christmas towels I will do some slightly modified towels with blue stripes.  They will be for sale.


Sunday, November 8, 2015

Rug #1 "Kowhaiwhai"

I started weaving the first of the three rugs yesterday.  The wool was waiting for us on the front porch when we arrived home from our trip from North Carolina on Sunday.  Two day delivery from Yarn Barn of Kansas and the 10% discount negated delivery charges anyway.

Dressing 'Bernie' was pretty straight forward. I used some linen I had over from weaving place mats a couple of years back.  It makes a good strong warp that hopefully won't break on me.  It did have a fair old bit of twist in it, which once wound on through the cross/lease sticks needed constant untwisting as I dressed back to front - although in this case that is technically top to bottom.

Linen warp going on to Bernie
After spacing the yarn out I added a row of red and white twining before starting the first stripe which is a neutral silver.  I then tied on the cartoon design for the kowhaiwhai stripe and started with the black/red/white.

Pattern stripe appearing.
It will be slower than the plain stripes, but seems a little easier than the zig-zag pattern on Turquoise Lightning (where I used shuttles).  For this, as I have many color changes, I have butterflies of the appropriate yarn hanging ready for the next shot.  It will get a little more complicated, but as long as I maintain consistent 'rules' for the change of color cross-overs it should work out.  Time will tell.


Friday, October 30, 2015

2015 Christmas Towels half way

Progress on the Christmas towels has been great.  I decided to weave these in two batches to make the warp easier to wind.  Turned out well and today I cut the first 10 off BigMac.

The red and green I dyed this year was slightly different to last year.  Forest Green vice Kelly Green seems a lot more 'Christmasy'.  The design this year has solid stripes rather than the red/green mix I did last year which wove a lot faster.

Enough dyed yarn for warp and weft stripes.
The warp winding for 10 towels took a while and is close to the maximum for my warping board (about another 3 yards would see it full).  Anything more will need a warping mill or use the sectional beam on the loom as designed.  I do have a Leclerc Tension box that will work on BigMac but would need to build a bobbin rack.  Perhaps before next year.

Warp wound and tied off.
Dressing the loom also went smoothly.  I had assembled (but not glued and sanded) my new angel wings for BigMac and with Anne helping by supplying the necessary tension and de-snagging the wind on was simple. I may use slightly thinner dowel next time, this was all that I could get at the time.  It works fine, but thinner dowels would mean being able to see the 'next' warp thread from my normal position sitting directly in front of the heddles.  Threading the heddles went without error and only one snag on the reed where I forgot to skip a dent.  I un-did it back to the error and re-sleyed it!

Angel wings in operation.
Weaving turned out to be fairly fast.  45 - 50 minutes per towel.  The first day I did 1, then the next two days 2, then yesterday 5 to get them finished.  The repeating pattern for the huck lace design was simple to remember luckily, and I don't recall having to 'un-weave' even once.  I didn't have a temple large enough for these towels - I'll have to get one some time - but the thick cotton under tension seemed to hold the selvedge fairly well once it had drawn in a bit.

First few pattern repeats.
This morning I cut off the cloth and zig-zag stitched the ends then trimmed the odd end before throwing the whole lot in the wash.

Stack of 10 towels ready for end stitching.
The wet finishing has improved the feel immensely and closed up the structure nicely.  The pattern has pulled in the edges a little but nothing to really notice and I'm sure that will settle a bit more - it did a little after a quick press.  I now have to cut each one then fold and hem the ends - machine stitched for speed.

Then on to batch number 2.

Saturday, October 24, 2015

Loom Room

Not quite a weaving studio yet, but over the last couple of days I have managed to make my loom room (spare bedroom #3 - but really fairly small for that purpose) a little more functional. 

Up until now I had so many bags of wool/locks/bats/etc along with boxes of miscellaneous weaving/spinning and odd stuff, that I could only generally use one loom at a time. By stacking the 'stuff' in behind 'Bernie' - the upright loom, I could use 'BagMac' - the Macomber.  Then swap everything around to do the opposite.  Little 'Dot' - the Leclerc Dorothy was mostly hidden under piles of paperwork on the bench so to weave with it I just took it out of the room.

No more!!

I have packed up all the spare wool/yarn etc and moved it up into the attic - where I can still get to it, but it isn't now in my way!  This has meant I actually have two looms dressed - BigMac and Bernie and the plans are underway to dress Dot as well (I have to dye some yarn first).  I even have a little bit of room on the table to work on planning - although it is crowed by some large cones of yarn that will have to move...

Looking almost like a studio (albeit fairly cramped!)
BigMac has a warp for 9 (of the 18) Christmas towels, and Bernie has warp for 3 rugs for an exhibit next year.  More info on both those projects to come.

Thursday, October 15, 2015

Llama order

We finished the brown/black portion of the llama fleece a little while back  The final part was to give it a final wash to remove any remaining dust/dirt and set the yarn.  It turned out to be a little over a pound of yarn in 8 skeins.

Llama yarn after final wash
I'm awaiting word back from the owner before dropping off these skeins.  We still have the other 'half' - the white/cream part of the fleece which is a slightly larger amount, so I'm expecting 10 skeins.  Anne does a lot of the picking where we thoroughly remove all visible VM and guard hairs. We are left with a big box of fluffy wool which goes through the drum carder in 1 oz lots.  I have found that once through is enough with this wool then I use a diz and remove it directly from the large drum as roving.  I then pre-draft that roving to give me a perfect spinning diameter roving.

Llama roving ready to spin.
The 1 oz limit is a comfortable amount for the carder - it can hold 2 oz of fibre but at the 1 oz mark I can spin that roving onto one bobbin, spin another, and the result when plied is a 2 oz skein regardless of the thickness of the singles I spin.  This white batch I am spinning a little thicker. It is quicker and also will give the owner another type of wool to sell as up until now most has been spun at fingering or fine.


Sunday, October 11, 2015

Loom modification

While working away at various pieces of the loom restoration I had noted that the top front bar on the castle showed marks most likely caused by Scotch tape - used to hold instructions/guides to the weaving.  I (on my Macomber) typically put the instruction for the treadling sequence there - but just folded so that it hooks over the wooden bar.  That solution works fine until I turn a fan on if it is too hot - it typically blows my notes away.  Options then include clipping it on, or balancing something heavy across the castle on top of it.  It has always been in the back of my mind to find a solution.

All the wood on the restoration loom is being sanded down and refinished so I wasn't worried about the marks, but decided to use that loom to try an idea.

Castle bar with Scotch tape marks
The first thing I did was drill holes from the back (using a stop) through to within 1/8" of the front surface.

3 holes drilled from back of bar.
The I glued a super strong neodymium magnet into each hole.  I had the magnets for other project work

Magnets in place
It's then a simple case of using decorative magnets (or simply more neodymium magnets) to afix notes/guidance/instruction to the front of the bar.

Finished modification
In the picture above only the cross bar has been sanded and finished - the difference between it and the rest of the castle can be seen and is much more obvious in brighter light.  This works really well so I will be modifying both the Macomber and the Leclerc next.

2015 Christmas Towels

Last Christmas we gave dish-towels to the siblings (one per family) and scarves to nieces and nephews.  It was done while I was working at Amazon, and on two looms with mostly 'stash' fibre.  This year will be different:

a) I'm starting early!!
b) everyone will get dish-towels, including sons, daughters, nieces, nephews, one per household again.
c) I've bought the cotton yarn which was an 'odd lot' from R&M yarns.

Based on the success of the huck lace towel design last year, I spent several hours this morning planning a new design for this year.  I'm using, once again, some red and green stripes and diamonds of huck lace in a grid pattern.  Even with software it took a few attempts to get something that would work with the amount of cotton I had.  Once designed I refined the initial calculations and was able work out how much cotton yarn to dye in the two colors for both warp and weft.

Then after a quick trip to the shop to get some non-iodized salt I began the dyeing. It's about an hour and a half per colour including clean up.  The green is into the final 30 minute soak after the addition of the soda ash fixer to the Fiber Reactive Dye (from Dharma Trading).  I'm using Fire Red and Forest Green this year which may not be exactly the same as last year, but I had these colours already.

The red is rinsed and as soon as the green is too I'll give them a wash with some Dharma Professional  Textile Detergent then rinse and hang to dry.  I should be able to begin warping in a couple of days.  Given the number of towels to weave I'll be doing it in two equal lots.

Wednesday, September 30, 2015

Natural dye day

The Scenic Valley Handweavers Guild (scenicvalleyhandweavers.blogspot.com/) dye day was held today at R&M Yarns (www.rmyarns.com). Being a fine day we set up outside in the carpark.

My contribution was to conduct a mordant guidance lesson at a guild meeting a couple of meetings ago, so that everyone who wanted to attend could prepare their yarns suitably prior to the day.  That worked well and we then posted out the e-copy of the handouts to everyone so that if they signed up to attend they had the instructions too.  Which it could be noted was a cunning way to avoid having to hear me drone on for an hour about all aspects of mordanting...

I also compiled a few fact sheets for the various dyes that were finally chosen for the day.  Facts including their various names, where they grow, what results are likely (cotton and wool were the main focus), based on the use of alum as a mordant, the procedure and cleanup afterwards. 

I brought the indigo dye pot and another guild member contributed a walnut dye ready to go.

The more active part of the 'dye committee' managed to pull together 4 dyes: barberry, blackberry, iris, and coreopsis and pots, buckets, samples, burners, rinse buckets, after dye dips of vinegar, baking soda, and copper plus a whole lot of wool and cotton samples

4 of the dyes, walnut and indigo out of picture.
 The dyes minus indigo needed to have the dye material in before bringing up to a simmer and held at that temperature for an hour.  This involved everyone adding little labels to their goods which included a fair mix of cottons and varieties of wool.  The indigo pot was at 120 degrees and was held close to that for the extent of dyeing.

Indigo pot looking good prior to dyeing.
We managed about 5 dips of various combinations of dye material in the indigo with good colour throughout.  To dye the final batch I did add a little Thiox and let it develop a bloom again.  Afterwards I sealed the lid on with a square of rubber and used a bungy cord to hold the lid down to bring it home and have now fed the pot with some madder and bran so that Anne and I can do some further indigo dyeing here at home.

The various colours achieved.
In the photo above there are wool examples of (in front) indigo, coreopsis, coreopsis with baking soda, then (behind), blackberry, barberry, walnut, iris, coreopsis, and indigo.  Variations were seen between different commercial wools, definitely between cotton and wool, and between wool with an after dip of baking soda or vinegar.

While I was getting the ingredients ready for the indigo pot I discovered 4 oz of madder that I had forgotten I had.  I'll have to try that soon.  My dye efforts were only a sample skein of handspun alpaca (from NZ) each of walnut and indigo. Both turned out lighter than commercial spun wool, but both have a much nicer sheen to them.

Everyone washed and hung their various dyed materials and we all sat down for a shared lunch.  Plans are afoot for next year...

Loom restoration

As previously mentioned I'm now in the loom restoration business.  The Townsend Artisan Guild had been given a couple of looms, one of which was in pieces after a considerable time in storage.  I was first asked to have a look at it some months back but it wasn't until I was in Townsend to help out at the Blue Ribbon Country Fair over the weekend that I was able to do this.

The loom can be restored without too much difficulty - it's only missing minor parts, and has a small amount of damage and wear and tear.  It's a 36" (maybe nearer to 39") 4 shaft jack loom that appears to be home made with commercial heddle frames/heddles so it may have been a kit or a loom to build at home from commercial plans.  I initially thought 1960's or thereabouts, but the reeds come from a company that may not have been around then as it traded much earlier than that, so it could be anywhere from 30's through 50's.  I'll be trying to get some more of the back story to complete that part of the puzzle.

All the pieces.
The first task after unpacking here in the valley has been to identify, measure, photograph and document each part.  This is the only way I can assess how much work will be required and thus give a fair quote, and also identify what is missing and will need to be purchased to identify to the guild approximately how much the 'and parts' segment of the quote will be.

The parts that are missing are mainly nuts, bolts, and screws.  The wire heddles and tie-up chains will need replacing entirely, but they are available and come relatively cheaply.  I will need to fiddle with the warp beam ratchet release as it is not obvious where it was fitted previously, but the solution may be to replace it entirely with a friction brake.

I said after restoration I would weave something on it as a test, so after doing that I may make further recommendations that might help make the old loom better but keep it in character.

The bulk of my work will be sanding down the old wood and then refinishing in something appropriate.  The guild is happy for me to take my time which pleases me as I would like to ensure I do a thorough job getting this loom back to working order.

Tuesday, September 29, 2015

Blue Ribbon Country Fair

My day in Townsend started well with a very easy drive north on the 411 through Maryville to Townsend where I arrived early enough (as planned) to visit the Artistic Bean coffee shop (see: http://theartisticbean.com/) before my first meeting at the studio to look at the donated loom.  Anne and I had found this coffee shop when we were here for the wool festival in spring.  They have very good fresh roasted coffee and even know how to put a fern design on a latte (rare over here in SE Tennessee).

Once suitably caffeinated, I headed back down the main street to the studio where I was able to have a close look at the loom that had been donated to the Townsend Artisan Guild.  They wanted me to do so and see whether or not it could be restored so that they could use it in a 'working display' mode at the Heritage Centre some time in the future.

That first quick look (I had only seen a couple of photo's previously) was enough to pack it all up in the truck, reasonably confident that it could be put back into service.  More on that topic in a future blog.

From there I headed to the Smokey Mountain Heritage Centre to set up the weaving demonstration that I was to man for the day.  I was lucky in that someone else had dressed the loom, a Harrisville 24" 4 shaft jack loom (see: http://harrisville.com/weave/22-floor-loom-4-harness-6-treadle/), so all I had to do was open it up from its folded state and set up a display of some weaving odds and ends before the first visitors began arriving at 10:00 AM.

The weaving display
The loom was set up with a cotton warp in blue and white stripes and was (I was told) about 3.5 yards long.  The person who had set it up had woven about 6 inches to check it out then basically left me to weave as I pleased.  As I had two shuttles I decided to do weft stripes at the same size as the warp.  After four stripes of tabby I then moved to a twill and did 4 stripes to the left, then 4 more tabby and 4 twill stripes to the right.  After another 4 tabby stripes I then began zig-zagging the twill left and right each time the color changed.  As I didn't have floating selvedges I had to plan the 'entry' side carefully for twill and especially the zig-zag to ensure that the outermost thread was caught on each pick.  Added a level of complexity that I don't normally have!

The weaving so far...

I had a steady stream of visitors who enjoyed just watching at one end of the spectrum right up to a few who were willing to have a go at weaving a few picks.  I didn't finish the whole warp so I guess I talked rather a lot.  I do recall being able to give some tips to a couple of beginner weavers, and had quite a few (mostly males) questioning 'how it all worked'.

I packed up about 4 and was safely home just after 6 after a busy but enjoyable day.  The loom was easy to weave on and the ability to pack it up (with warp still on) and throw it in the back of a car is a definite plus.

Friday, September 18, 2015

Ongoing llama processing

The llama processing is now turning into a fairly smooth routine.

First part of the process is to wash and dry batches of wool.  We are handling the brown wool at present - it comes in several shades, but we are blending it as we go to produce a fairly consistant color.  Next we remove the guard hairs and pick through the locks to make the carding process easier.

Removing guard hairs
This is typically done on the coffee table while watching something on TV - seems to work OK.

After picking (opening) 2 oz we card two 1 oz batts.  Initially we then removed the batts and to spin I would rip lengths off and stretch it out before beginning.  Lately I have been using a diz and removing directly from the carder as roving.  I had tried this before without too much success, but it now seems to be going smoothly.  I'll take photo's and post in a future blog.

Llama wool
In the photo above there is washed wool drying on the rack, a spun skein on top of a 1 oz batt.


Next guild challenge finished

It took less than an hour to weave 4 coasters to complete the guild challenge (complementary colors, twill and tabby).  However, it took more than half a day to wind the warp and dress the loom!  Then after cutting them off the loom, an extra hour to stitch the hems.
Coasters still on the loom, ready for hemstitching
I stitched the first hem on the loom, and then cut the cloth off and stitched the remaining edges before removing the spacing cardboard.  Seemed to work OK.
Finished coasters (mug rugs).
The challenge due date is not until the October meeting, but it was better to get these done so I can focus on the llama spinning which so far, is going well.

Wednesday, September 9, 2015

Townsend Artisan Guild

Clun Forest felted scarf.
This is the felted scarf made by a member of the Townsend Artisan Guild and currently in a local exhibit.  She bought all the batts I took to the last guild meeting so I expect I will see more work from her.  At least it is proof that Clun Forest wool felts well.

The other potential work in Townsend is to look at whether or not an old loom can be restored.

Old loom shot 1

Old loom shot 2
From the pictures it looks like a 4 shaft jack loom probably 36" or so wide.  The wood has some water damage and the wire heddles look a little worse for wear.  That being said I should be able to check the actual condition of the wood and what is there/missing when I visit on the 26th of this month.  After that I should know if it is worth restoration.

Otherwise I will be demonstrating weaving at the Blue Ribbon Country Fair (http://www.gsmheritagecenter.org/2014/07/blue-ribbon-country-fair/) for most of the day.

Sunday, September 6, 2015

Wool processing

1 lb of Clun Forest batts
I attended the Tennessee Valley Handspinners guild meeting yesterday in Knoxville and took the 9 batts of Clun Forest wool along as at the last meeting I went to one spinner bought my complete stock.  Anne and I finished the 9 batts above on Friday after spending some evening TV time flick carding washed locks.

Before the meeting had even started all 9 were gone to a spinner from the Townsend Artisan Guild (they host the Smokey Mountain Fibre Arts Festival each year - this year I did spinning demonstrations and sold a little bit of product there).  She had tried my Clun Forest wool before and has in fact made a felt scarf from it, which is entered into a fibre show (photo's to follow).  She loves the way it felts and takes dye and has great plans for this batch of wool.

Also at the meeting I was asked to do weaving demonstrations at a one day fibre festival in Townsend and while there look at an old loom the guild has been given, to see if it can be restored back to use.  If so, can I do it for them.  There may be some work in that exercise.

Today I have started back on the llama fleece.  First job was to sort it into light and dark colors.  There is a total of 3.8 lb of raw wool, but after blowing out the dust, scouring and removing guard hairs, then carding there will likely be 2.5 lbs give or take a bit.  That will still produce nearly 20 skeins which is the largest order to date.  More to follow as the processing continues.

Llama sorted by color.

Saturday, August 29, 2015

Back to Work

We dropped in to see our llama/alpaca customer on our way to Knoville to visit Anne's brother and family.  The demo skein of llama and the short 48-ply 'rope' were both huge hits so not surprisingly we came away with an order to finish the llama into skeins and reserve all the separated guard hair so that I can work out a way to make longer lengths of rope/cable.  Having grown up playing sport at a park next to Dunedin's rope works - the rope walk being a very long low building on one side of the field (although the memory is somewhat hazy!) I understand the theory, and was able to use tools I have to make a short length of laid up cable. The trick will be extending that.  There is about 3 lb of llama to process, so by the time it is sorted and guard hair removed it will be a little over 2 lb of wool to spin and about a month of part time work.

Llama in the front bag - Clun Forest washed locks behind
The other work is to supply a spinner in Townsend, TN with 'as many Clun Forest batts as I have'.  Currently that is zero, as I sold the last 6 I had at the last Knoxville guild meeting I went to.  So last night when we arrived home from Knoxville Anne and I began flicking Clun Forest locks that we have had stored for quite some time.  Flicking the locks open makes the job of drum carding very easy.  Another alternative is to tease them open by hand or put them through the picker.  These locks being quite long they are best flicked.  I do have even longer locks (the best) that were sorted after the original cleaning.  They are reserved for combing into top.

Flicked locks and the tools of the trade
An hour of flicking produced enough for the first batt.  The guild meeting is coming up next weekend so we should be able to produce a good supply for my customer.

Wednesday, August 26, 2015

Mug Rug/Coaster challenge 2

The Scenic Valley Handspinner challenge for October is another (in the series) mug rug/coaster.  This time it is to use complementary (from the color wheel) colors and weave with tabby and twill.

This morning I dragged out my large box of odds and ends of wool.  Most of it a legacy from my Father's weaving days when he would buy the leftover 'ends of line' balls of wool from my Mother's wool shop. I felt reasonably sure there would be something appropriate and was not disappointed.  I had to wind skeins to measure the lengths of the yarn I found and it turned out to be 240 yards of both blue and organge.

The chosen yarns (colors didn't reproduce well)
The challenge calls for mixing tabby and twill which, of course, could be simple stripes.  I thought I would try something a little more complicated and put boxes of twill inside tabby surrounds.  Here's the computer simulation:

WeaveDesign simulation
The mix of twill and tabby will be interesting to see in the completed coaster, with the epi/ppi figures somewhere between a perfect twill and a perfect tabby.  More photo's as I warp and then dress the loom.

Monday, August 17, 2015

Llama spinning

It's been over 5 years since I last spun llama.  I think my technique is just a little better!  This time differs a little in that the order was to spin not just a sample of a llama wool, but also make something out of the guard hair that we removed before spinning the very fine fiber.  With the last llama we didn't keep the guard hair so this was certainly a first.

This fleece had a lot less guard hair (the course '2nd coat' that protects the softer inner fiber).  Some llama have it, others don't and it isn't found throughout the fleece, but for best results it should be removed as the soft fiber is every bit as good as alpaca, but would feel more coarse if it was left in.  There may very well be machines to do this, but at the amount I will ever likely have to process that is not an option so it is removed by hand, lock by lock.  Luckily for me, Anne doesn't mind this fairly tedious task.  As it turns out with this particular fleece the guard hairs can be seen easily and by grasping them in one hand and the lock base at the other they simply pull apart.  Without needing to be too fussy.

The result of a quick trail of some of the white (it is a white and brown fleece) resulted in a nice 2.3 oz skein of very soft 2-ply super-fine, and a very short segment of 48-ply 'rope'.

Llama trial and some tools.
The rope section was made by spinning singles from the guard hair which had been collected in a bag.  I took handfuls and teased it out slightly before spinning it with a short forward draw.  3 singles into 3 ply, then dividing the resultant yarn into 4 and using the fringe twister making a 12 ply.  That was again divided by 4 and twisted again to make the 48-ply.

'Fuzzy' 48-ply rope.
There's no comparison to the 2-ply yarn...

Soft 2-ply super-fine.
My customer wants to be able to show different product that come from her animals. Hopefully this does the trick.  It was interesting to make the rope, but there's no way it would ever be worth making more given a) the smaller percentage of guard hair to fine fiber, and b) the complicated process that I can get to work in small amounts but would be defeated if any longer.

Wedding Gifts

With a little time to spare (although not much!) I finished the weaving of the shawl and scarf wedding presents.

Finished and celebratory wine.
This only left the fringe twisting...   at one stage I had visions of Anne sitting in the car on the way up to DC for the wedding, busy twisting fringes on the finished weaving, but as it turned out that was not necessary as with a couple of half day sessions I was able to finish the job, give them a final wash to set the fabric and then after drying, package them ready for the wedding.

Shawl ready to go.

Scarf ready to go.
We had a great time in DC, MD, VA for the wedding and managed to catch up with many friends and family.  We were on the go the whole time so it took a couple of days on return, to wind down, unpack, and get back into valley life.  The garden largely survived and our hummingbirds had not deserted us. 

Moving on now to the next project to spin a sample of llama wool and also spin some of the removed guard hairs and then ply/cable them into cord.  More to follow.

Monday, July 20, 2015

Fast Weaving

I've begun weaving the wedding present scarf after tying it on to the previous warp (cut off on the beater side of the heddles.  I only had to re-thread the 24 'edge' threads which form a simple diagonal twill line and on the shawl were several inches further out.  Otherwise the pattern is the same, just not the stripes.

Scarf progress
The weaving is a lot faster for two reasons. The scarf is only 13 inches wide (vice 23), and the yarn is a lot thicker. It shouldn't take too many sessions to finish the weaving.  I was able to do quite a bit yesterday in between other things in and out of the house.  I baked French bread sticks and a loaf of beer bread and some banana muffins which we had with coffee for breakfast.  Then later in the day I made up a half jar of harissa from the many chillies that we now have coming from the garden.  Finally I made some pizzas for the freezer, and one for a snack for when Anne came home from work at 9:00 pm.

Pizza baking results
Should find more weaving time today as we don't have to water the top garden.  A convenient thunderstorm passed through yesterday afternoon and dropped a nice amount of rain on us.

Friday, July 17, 2015

Finishing and Starting

I've been busy with produce from the garden recently with the first lot of blackberry jam, barbeque sauce, and tomato sauce done, plus some quick re-potting and weeding.  We have pounds more tomatoes, plenty of blackberry in the freezer, and lots of hot chillies coming from the garden ready for use.

Tomato sauce cooling, blackberry jam done
So in between those efforts I have been sewing in the ends on the shawl and knotting the warp threads prior to fringe twisting. 

Shawl ready for fringe twisting
This morning I warped the yarn for the scaft - matching colors but a different stripe pattern given that it is only 13 inches wide. 

Warp ready to be tied up.
I have been warping on this warping board for some years, but only in the last year attaching it to hooks on the wardrobe doors.  The hooks normally hang on the inside with various robes on them, but work well to keep the board at shoulder height which reduces the back strain considerably.  I leave the center pull balls of wool of the floor and in this case, join at the color changes when appropriate.

Warping board hung on wardrobe doors.
When I cut the shawl off the loom the heddles are still threaded so I should only have to tie this warp to the appropriate number of threads (EPI is the same despite the slightly thicker yarn on the scarf) and pull it through. Hopefully that should happen today, in between other jobs (brew day at the Oak & Fern is number one on the list, then more jam).